Snow globe Service Activity

Our December activities go hand in hand but will be done in two parts.  Part one was making snow globes and practicing Christmas carols.  Part two will be the service portion where we will deliver the globes and sing carols to residents at a local nursing home.

To make the snow globes, we used:

Babyfood jars
Gold and silver spray paint
Mini ornaments
Glycerin
Distilled water
Artificial snow
Hot glue

Of course, you can improvise as needed.


Here is a video that explains the process.

A few tips:

*Make one to use as an example.  This will eliminate a learning curve during the activity :)
*Fill the jar to the brim with water.  The girls who didn't do this had air bubbles and the snow would not fall, it stayed on the top, near the air pocket.
*We spray painted our lids gold and silver to color the Gerber markings
*Glue the lid shut.
*We didn't sand the inside of the lid, but I think it would be helpful and ensure the trinkets stay attached.
*She recommends epoxy but hot glue worked just fine
*We opted for babyfood jars because not only does it keep the over all cost down, but it also takes up less space for the nursing home patients.

Once the jars were complete, we used tissue paper and ribbon to wrap up the snow globes.  I recommend wrapping them with the lid on the top, just in case they leak :)

We bought supplies for 16 snow globes and it cost less than $20.00:
16 jars (30 cents each)
Mini ornaments (they came in sets of six and nine and cost $1.98 each)
Glycerin ($3.88)
Snow ($2.50)


When everyone completed their wrapping, we practiced a few carols.  One girl even volunteered to bring her violin along to play a song for the residents.  I was very impressed that the girls were so excited to deliver their gifts and sing.  I think it will be a treat for everyone!


Thanksgiving Activity

We had a great Thanksgiving activity yesterday.  We started out by making a gratitude board.  The girls all said things they were grateful for and we wrote them on the board.  Without any coaching, the majority of it was filled with the normal things we say we are thankful for, i.e., family, technology, love, etc.

Once they ran out of things to say, we showed them this short video-

The girls were silent as they watched.   It is a very touching video that pulls on your heart strings.  Once it ended needed we went back to the board and tried to fill it up even more.  This time the things they were thankful for came faster than I could write!  Clean water, shoes, beds, washer and dryer, Heavenly Father, Jesus Christ, shoes, heat, A/C and more!

We also showed them this video but it was a little too long and the younger girls lost interest.  It might work well for an older or smaller group.


Here is our finished board-


We spent the remainder of the time making thankful books.  Each girl got three brown paper bags then folded them in half.  We cut small slits (you could also use a hole punch) then fed twine or ribbon through to hold it in place.  The girls then had free reign to decorate it any way they wanted.  They all left with the challenge to write things they are thankful for each day between the activity and Thanksgiving.

Here are some of the books they made.


General Conference Activity II

We had to revise our activity just a bit so I thought I would share how the changes we made.  We still used some of the ideas from my last post.

First off, as mentioned in my previous post, we did discuss the calling of new apostles as well as play Conference Headbandz.

After that we discussed having our questions answered during Conference.  Each girl received a pen and mini composition book (4" x 3.25").  We found some really cute ones with polka dot and chevron patterns in the stationary aisle at Walmart in three packs for 88 cents.  Does it get any better than that?

We instructed each girl to write a question her book that she could seek the answer for during conference.  We gave examples of questions like:  How can I fight with my family less?  Is the church true?  I am struggling in school, what should I do?

Oftentimes, I feel like adults go into conference with questions but we forget that our little ones have questions too and are capable of finding answers as well.

Each girl was then given a slip of paper to glue into the front cover of her book that looked like this:

Red-  
Prayer
Book of Mormon
Priesthood
Tithing

Yellow-
Love
Word of Wisdom
Fasting
Commandments

Pink-
Family
Joseph Smith
Service
Church

Orange-
Prophet
Family Home Evening
Testimony

Faith


They were also given a bag with 16 Starbursts.  Each time they heard a word during one of the talks from the list, they were to eat a corresponding Starburst.

To close the activity we decorated autumn themed sugar cookies.

General Conference Activity Ideas

Since conference is right around the corner, we are going to be gearing our activity next week towards that.  Here are a few links that you might find useful in preparing a General Conference activity.


We will be playing Conference Headhandz from LDSLane.

Another game you could play comes from Cookie Nut Creations.


This is based on the game Don't Eat Pete.  Here is her description of the game:

Priesthood Leaders; "Don't Eat Me"
This is based off the ever popular game "Don't Eat Pete".  For this game you will need some easy to eat candy, or you could also use chocolate chips, marshmallows, fruit snacks, goldfish crackers, etc.  Using the provided image below, place a piece of candy on each individual person.  Then, send the person who is "it" out of the room while the remaining people choose a priesthood leader who's candy piece shouldn't be eaten.  Once a leader is picked, bring the person who is "it" back into the room and let them start eating the candy.  If they start to eat the candy off of the leader that was picked everyone yells out "Don't eat me!" or "Don't eat Jeffery R. Holland!" (for older kids).  Now it's someone else's turn to be "it".

We will also be making a variation of these conference notebooks from Cinnaberry Suite.
Because there will three new apostles, we will probably forego the pictures and just do names, leaving a space to write in the names of the newly called apostles. 

On that topic, this is a great opportunity to teach the girls how a new apostle is called.  I love how simply Elder Christofferson explained it this week.  
Elder Christofferson said the selection and calling of new apostles to the Quorum of the Twelve is the prerogative of the president of the church.
"President Monson, I don't know if this always has been the case, but his practice has been to ask each of his counselors and the members of the Quorum of the Twelve to give him names they would recommend for his consideration, not to discuss with each other but just individually, to give him whatever name or names they feel impressed he ought to look at," he said.
"What process he goes through exactly, I'm not sure. That's, again, something private he pursues. He then brings back, when he's reached his decision and had the inspiration he needs, the name or names to the council that we have of the First Presidency and the Quorum of the Twelve Apostles to sustain it. That goes forward to general conference."
In April 2009, President Monson selected Elder Neil L. Andersen as a new apostle after the December 2008 death of Elder Joseph B. Wirthlin.
"I recall this last time around when Elder Neil L. Andersen was called," Elder Christofferson said. "Before that happened, we were just discussing casually before one of our meetings of the Twelve about the vacancy, and I remember President (Boyd K.) Packer saying, 'We don't have to worry, President Monson knows how to get revelation.'
"That's what it is, a revelatory process in the end. Different prophets may approach it in different ways, but in the end, it's finding out from the Lord who he wants."
You can read the entire article here.  
Here are a few other sources that explain the process:
President Hinkley shared the process during a conference talk.  This video is worth sharing with the girls-

This reference is easy to break down and share with the girls.

4th of July Tie Dye Shirts

In our little town, the Fourth of July is a big deal, so when we told the girls we would be making red, white and blue tie dye shirts, they were very excited!

Very little preparation was involved other than purchasing: red and blue dye, white t-shirts and rubberbands.  We did the activity outside on the lawn on a dollar store table cloth.

The girls simply created their design with the use of rubberbands then used the dye to create colors.  We put each shirt in a plastic grocery bag so they could take them home and let them sit.  We also gave them strict instructions to let them rest overnight, then to wash them alone.


The idea for this activity originally came from I Love to Create Blog, so this photo is from that site.  We used a different technique, but I wanted to give proper photo credit.


Since this activity didn't take too long, we also played some water balloon volleyball.

We used sheets folded into squares then volleyed waterballoons back and forth.  So simple!  No net necessary.  Plus, it provided lots of laughter! And teamwork ;)

Dinner Service Activity

My partner had a baby a few months ago so the girls and I made dinner for her family.  We kept the menu simple in order to be done on time and not have any hiccups.

Each girl, or a team of girls, was assigned a job.  I'll share some of those jobs below.

Main dish-

 Jobs-
Brown meat
Prepare pasta water
Cook pasta
Measure spices and other ingredients
Stir in pasta sauce
Stir in spices and other ingredients
Add pasta to sauce and meat

Sides-

Garlic bread
Jobs-
Slice bread
Butter bread
Sprinkle with garlic salt and parmesan cheese
Wrap in foil
Broil

Italian Salad-
Jobs-
Prepare lettuce
Cut salami, red onion, Roma tomatoes and black olives
Add parmesan cheese
Add croutons
Add prepared ingredients

*I generally dress the salad upon serving so we just put the desired amount into a small container so the family could dress it as they desired.

Dessert-

Rice Krispie Treats

Jobs-
Measure ingredients
Melt butter (I use a 1/2 cup.  It results in ooey-gooey treats!)
Prepare pan
Stir in cereal
Press into pan

Baby Blanket Service Activity

The mom of a little gal in our group is expecting a new baby.  We decided it was the perfect opportunity to pull out the sewing machine and quilting stands to make some burp rags and blankets.  The girls loved it!  They loved it so much that we repeated it again for our next activity.

We have a large group so we split the girls into two groups.  One group learned how to quilt with my partner and I worked on sewing with the other group.  We made some very basic burp rags out of flannel fabric cut into rectangles.  The girls each had an oppurtinuty to sew a few seams, do some ironing, take stitches out to fix mistakes and learn a few sewing basics.


The quilting part of the quilt was completed on the first week so my partner taught them how to bind the edges at the second activity.

It was impressive to see how quickly the girls caught on.  They had a great time!  This activity also provided an opportunity to serve a less-active family.  You could also make blankets and/or rags to donate to local shelters or hospitals.

Here are a few helpful resources to help with the activity-

Simple burp rag tutorial

If you don't have quit stands or are not familiar with quilting, consider a more simple approach.  I love this easy to follow video:


Here's another:


You could also add bibs to the activity!  Does it get any easier than making them out of place mats?


Quick Christmas Activities

I LOVE Christmas.  Maybe because my birthday is really close to Christmas day.  Maybe it's all the sugar!  I think it's probably all the extra love we feel because of the great gift we have been given by our Heavenly Father.  We want to share that love with each other.  One thing I love to do with my family, and with whomever I am working with in my current calling is to refocus on "Christ in Christmas".  Here are a couple of simple ideas that might help with that.

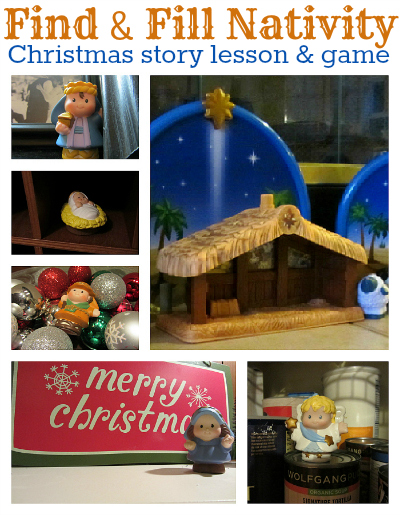
This one is from no time for flashcards.  If you go to her site, she had her children fill out little clue cards for each member of the nativity.  They read a story about the nativity.  Then the kids went and hid the pieces of the nativity.  They sent the mom on the scavenger hunt to find each piece.  They got to teach her about each member of the nativity set.  So sweet.  You could adapt this for AD very easily.  
This one is from myeyeq.
I LOVE this ornament.  She has a free printable on her site.  This is just a clear ball with a little bit of sand and some shells, but it reminds us that Christmas is a joyous time because of everything the Savior did for us, the Sermon on the Mount, Gethsemane, Calvary, and the Resurrection.  I tried to help our YW see this when I taught them this Sunday.  Christmas is Christmas because of Palm Sunday, and Good Friday, and Easter.  

                                                 
                                                      This one is fromlivelaughrowe.
So what does a snowman have to do with this Christ centered Christmas?  I thought this would be a cute and quick gift.  The girls could fill it up with a treat, there are so many pretty varieties of candy this time of year.  Then they can watch this:


                                                                      He is the Gift

Have you seen it yet?  It's very touching.  Have them take a minute and talk about what gift they can give back to the Savior this year.  Then go and give those cute snowmen to someone as a secret santa gift.  Or adapt any of these ideas as you would like.  Or use them to inspire you to go and create and teach your girls!  Merry Christmas!


Girls Who Choose God Book Review


So, a few months back I was asked by some lovely ladies to review this book that just came out, called "Girls Who Choose God."  It is written by McArthur Krishna and Bethany Brady Spalding, and illustrated by Kathleen Peterson.  Due to the missionary craziness in our house, it has taken me a few weeks longer to get to this than I had intended, but I am still excited to tell you about this amazing book!

It is all about women and girls in the scriptures, and I love it because we really haven't had a resource that focuses on all these great role models.  Since we work with young girls, I think it is so important to introduce them to lifelong friends and heroes in the scriptures.  There are many wonderful examples of strong, righteous women scattered throughout the standard works.  McArthur and Bethany put several of them in one lovely, thought provoking book.

The illustrations are beautiful and the stories are simply told.  But they also have a question at the end of each story, asking the reader when they have had to act as the girl in the story.  Having three daughters of my own, I appreciate this wonderful book.  I had my youngest girl read it, and she enjoyed learning about so many different women and their own stories.

The authors have a great online resource, HERE that shows different ways you can use this book, at home, or in activity days.  I promise, I am not paid by Deseret Book  :), but I would highly encourage you to look into acquiring this book.  I would even use some of my budget money, because I think it's such a great resource!  So, take a minute to stop by Deseret Book and browse through it, or if you live way out in the "mission field" like I do, which is pretty much everywhere but Utah, check out the website HERE and look around.  You will be glad you did!

Hello again!


So, you may have noticed that I have taken a break from this blog.  As you can see, we have been busy in our house!  A couple of months ago, we welcomed our son home from his mission to Uruguay, and last week, we sent our daughter off to the MTC.  She is Argentina bound!  Super exciting and crazy times around here!  I let everything go and tried to enjoy the few weeks all of us were together as a family.  

I have received some submissions and offers to help with the blog, and I am so grateful!  I will do my best to get all the posts up that have been on the back burner.  Thanks for your patience!  

Tami

LDS Blog Train Post: Pumpkins and Pompoms!

So, we have been invited to participate in the LDS Blog Train: General Conference Version!  I am excited, and more than a little intimidated, since I am NOT a digital designer.  However, I put on my thinking cap to come up with some simple activities that I thought would be enjoyable for not only AD girls, but little ones, as well.  Here is what I came up with-

General Conference Pumpkins and Pompoms

I love fall, harvest and Halloween!  You can use any of those themes to keep your little conference attendees paying attention.  

One great craft item that often gets overlooked is the humble pompom. 


You can buy a bag of them for just a couple of dollars.  And then, what, you ask?  Well, I will tell you!  

Idea #1:  Use THIS printable sheet of visuals and have the listeners cover each picture as they hear the topic mentioned.  You can use it as a bingo card, or have them cover the whole thing.


Idea #2:  Cut up the printable sheet of visuals and pick a few to tape onto small jars or buckets.  Whenever that topic is spoken of, the listeners can place a pompom into the container.  Or, go nuts, and use all the pictures for 15 different containers!  


Idea #3:  Assign each listener a key word, like "Jesus" or "faith".  Also, assign them a specific color of pompom.  When they hear their key word, they can put a pompom into their jar.  Having their own color just helps keep the pom stashes more equitable-intermixing of pom poms has been known to cause meltdowns. 


You can decide how to "reward" your listeners.  They may enjoy just filling up their cards or jars.  You might want to hand out a treat when they have reached a minimum level.  Hopefully, this activity will be flexible enough for both kids and moms to enjoy!

Now, on to the pumpkins!

Like I said, I am not a digital scrapbook designer, but I know how to shop on etsy!  And I used a kit I purchased on there to make a jack-o-lantern kit for conference.  **I did buy this with a commercial license included for personal use and also to make my own products, but just to be safe, please don't resell any part of this printable.  Thanks!** 


Build-a-jack pdf

This jack-o-lantern kit comes with pumpkins, noses, eyes, mouths, and also, some stems.  You can cut out the different parts of the jack-o-lantern and put them in different containers labeled with key words.  During each talk or session of conference, have your listeners build their jack-o-lantern by listening for the key words. Or give them a new piece for every 5 minutes they sit still.  Or give them a new piece for every 10 minutes they go without asking you for a drink.  Get out the kitchen timer!   Or you could even do this on the fly-for instance, telling your kids they can get a nose, if they hear President Uchtdorf say the word airplane or flying!  

Don't want to cut anything out?  Then next time you are anywhere near walmart, hobby-lobby, target, or any other store that sells halloween supplies, look for a kit that has pumpkins already cut out.  They are everywhere! 

I found mine at hobby-lobby, and grabbed a couple of sheets of adhesive-backed foam that I can have the kids cut up into jack-o-lantern features of their own design.  If you REALLY don't want to cut anything out, have them draw the pumpkin faces on with a water-based marker.  Easy-peasy.  

The only other thing you really need is some candy. Well, in my house, we do.  I need rewards to sit still for that long.  :) Oh, and comfy pjs!  Hope you enjoy conference this weekend!  

Go HERE for the build-a-jack PDF.
Go HERE for the conference bingo sheet.

You just came from granny enchanted.
Your next stop will be countdown to conference.  If you get lost along the way, go to the LDS Blog Train.


Duct Tape Jars and Tithing


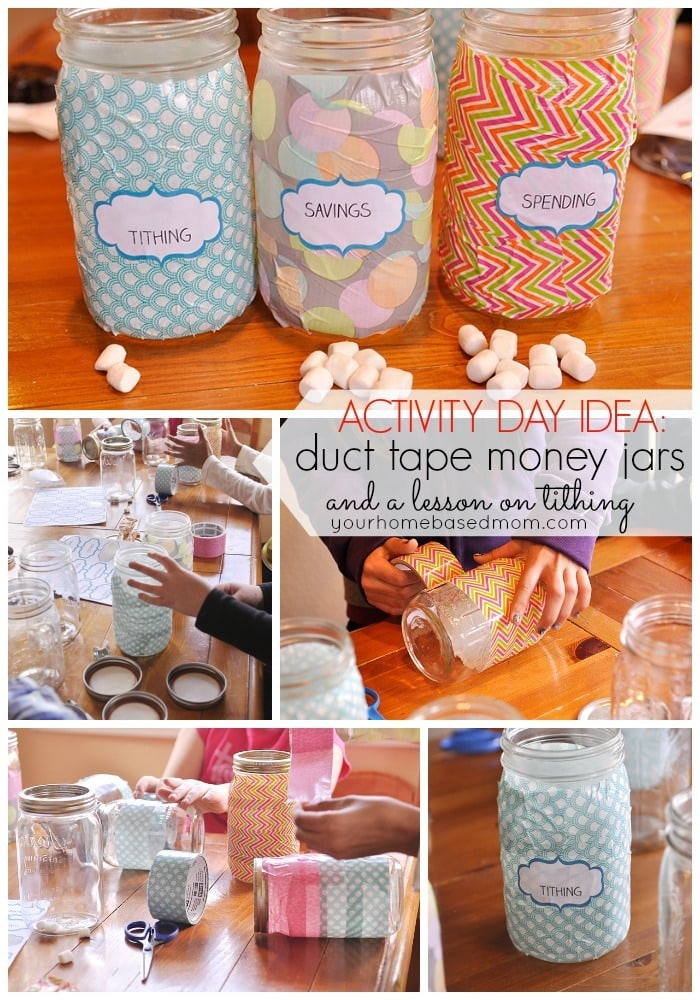
This amazing idea is from Leigh Anne over at your homebased mom.  Not only is she one of my favorite bloggers, but she is an AD leader!  So we can reap the genius of her great ideas with the wonders of the internet!  Hop on over to the link above for this great idea.  And while you're there, you might want to stay awhile and browse her other fabulous, fun, pretty, and delicious ideas!  Seriously, I have loved every recipe I have tried from Leigh Anne.  Thanks for graciously letting us "borrow" this, Leigh Anne!  

Mother's Day Wind Chimes

Image and idea from designdazzle.com


This post is from Melissa and includes a couple of ideas:  

They made this wind chime for Mother's Day.  Here is a pic of their projects in progress:


She also included some ideas for Earth Day-these would be great for other topics: gardening, service, spring crafts, etc. 

"Earth Day:  We talked about Recycling, Reusing, and Reducing.  I had 2 hand outs with word puzzles, what earth day is for them to work on after we were done with our 2 activities.  

We made bird feeds out of empty toilet paper rolls.  Yarn through the tube, they slathered on peanut butter, and then rolled it in bird seed.

We also talked about how plants grow.  They were given 5 seeds, and made see through greenhouses, so they could watch the stages of the seed sprouting.  A ziplock plastic baggie, wet paper towels, seeds.  We talked about what plants need to survive and how to take care of their seed until it was ready to be planted in dirt."

Thanks for sharing Melissa!  Keep those ideas coming!

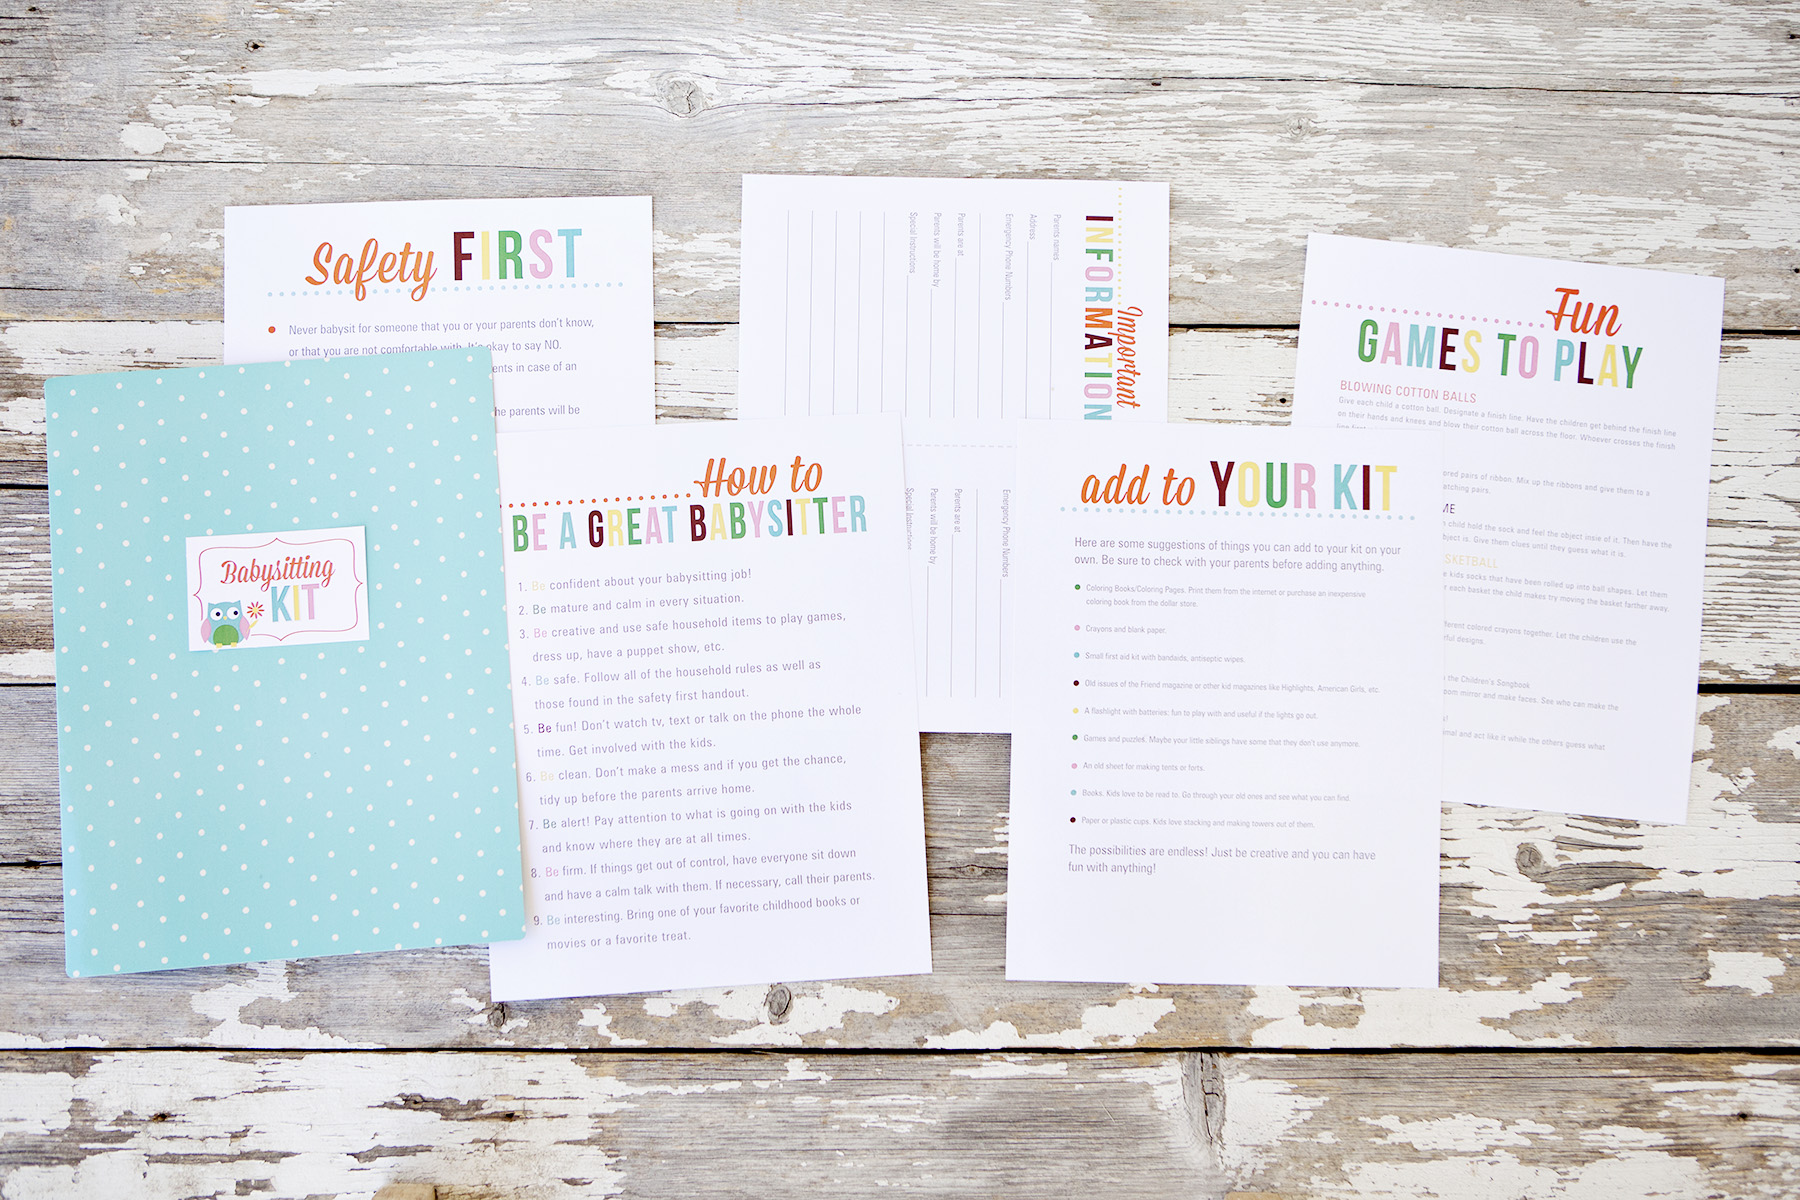
Babysitting Kit Update 2014


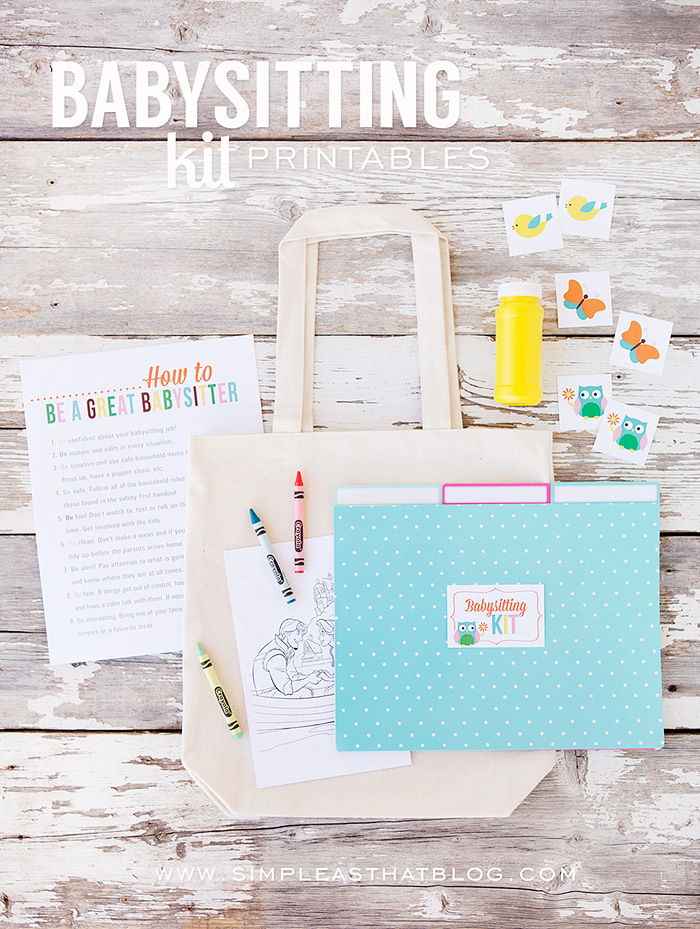
from simpleasthatblog.com

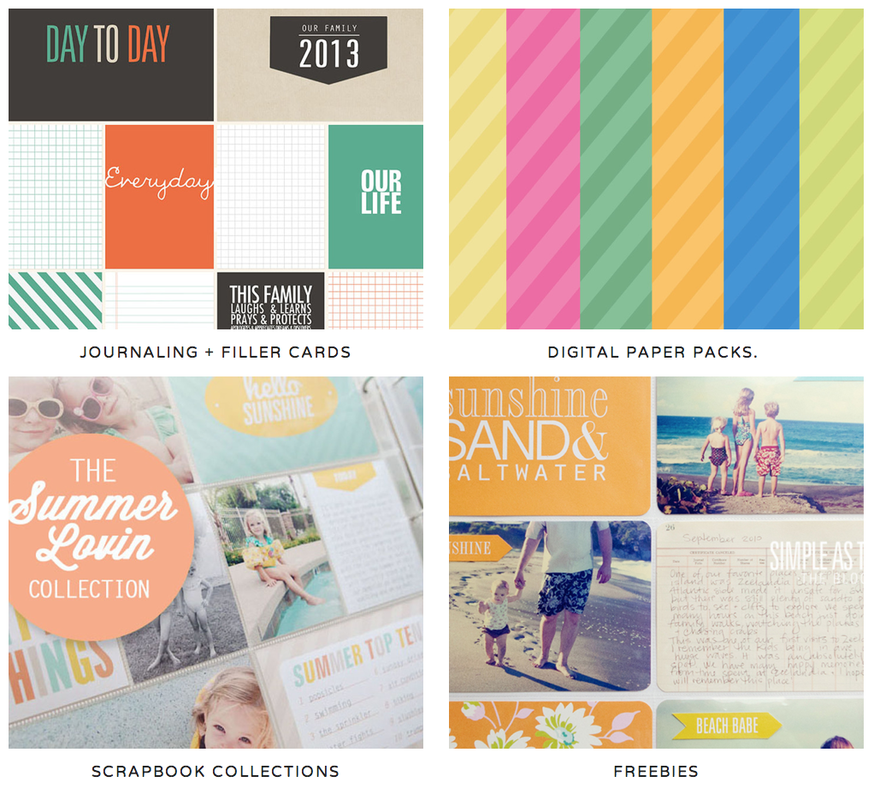
A lot of you probably know Rebecca from Simple as That.  I am a fan of hers from a few years ago when I found one of her amazing books on scrapbooking.  Now she makes all of these adorable creations:

  
She contacted me a few weeks ago and asked for permission to use an idea that has already been on here to create some new FREE printables for her AD girls.  Of course, I jumped at the chance!  So, I am happy to feature this adorable, new babysitting kit from her blog.
  
You can find it HERE.  Thanks for sharing your amazing talents with the rest of us, Rebecca!


Mother's Day Gift Ideas 2014

Mother's Day is right around the corner, and I think it's great to have the girls make something simple and sweet for their mom.  I tried to pull some ideas from around the net that you might find helpful!

This one is SO cute!  It's from Paging Supermom and can be found HERE.

You need a circle punch, some cute scrapbook paper, a cheap picture frame (or you might choose to leave this unframed and stick a magnet on the back), green card stock and paper baking cups.  I love the simplicity of this and that the girls can do it all themselves.


If you want to do something more in the pampering vein, this is a great spa in a jar!  It's a copy cat of Mary Kay's satin hands scrub.  Two ingredients, some cute jars, and you've got some Mother's Day love.  Go HERE to Raining Hot Coupons for the instructions.

Here's another de"light"ful idea.  :)  I love candles, and I think most women do.  Especially if they smell good.  Here is a super cute tutorial on how to make your own in a tea cup.  The girls might have a cup they want to use or you can go pick some up at the thrift store.  This cute idea is from The Wedding Chicks and can be found HERE.


I am working on one more project that I will have up tomorrow, but I hope these ideas give you some inspiration!
Related Posts with Thumbnails